Question Title
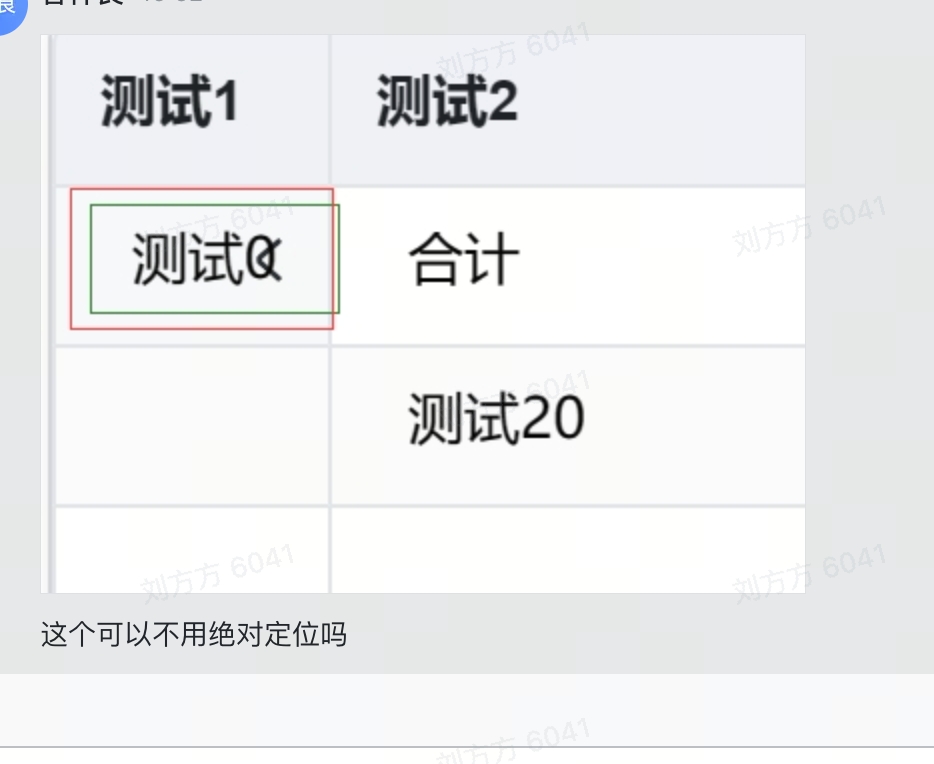
How to make text automatically omitted based on cell width when using custom rendering with VTable components?
Question Description
When using custom rendering with VTable in the product, the cell contains icon and text elements. It is expected that the column width can be automatically calculated based on the content at initial, and when manually dragging to resize the column width, the text can automatically be omitted instead of having the button float over the text. I am not sure how to write the code to achieve this effect of shrinking the column width and making the text turn into an sign '...'

Solution
We use the customLayout provided by VTable, which can automatically layout and automatically measure the width to adapt to the cell width. The specific writing method is as follows:
import {createGroup, createText, createImage} from '@visactor/vtable/es/vrender';

  customLayout: (args) => {
        const { table,row,col,rect } = args;
        const record = table.getRecordByCell(col,row);
        const  {height, width } = rect ?? table.getCellRect(col,row);
        const container = createGroup({
          height,
          width,
          display: 'flex',
          flexWrap:'no-wrap',
          alignItems: 'center',
          justifyContent: 'flex-front'
       });
        const bloggerAvatar = createImage({
          id: 'icon0',
          width: 20,
          height: 20,
          image:record.bloggerAvatar,
          cornerRadius: 10,
        });
        container.add(bloggerAvatar);
        const bloggerName = createText({
          text:record.bloggerName,
          fontSize: 13,
          x:20,
          fontFamily: 'sans-serif',
          fill: 'black',
          maxLineWidth:width===null?undefined:width-20+1
        });
        container.add(bloggerName);
        return {
          rootContainer: container,
          renderDefault: false,
        };
      }</br>
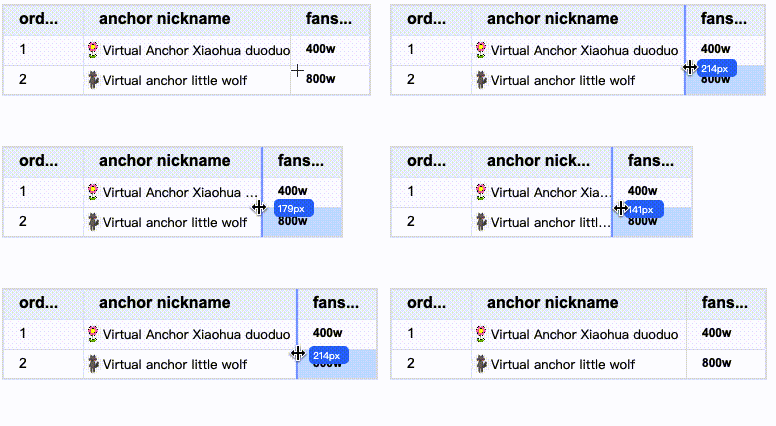
CustomLayout needs to return a rootContainer, usually a Group object, to serve as a container for other content. Here, flexWrap is set so that internal elements (icon and text) do not wrap, and alignItems and justifyContent are used for horizontal and vertical alignment. The Group contains an Image and Text. If you want the text to automatically truncate with... when the space is compressed, you need to configure maxLineWidth. A special point here is that when column is set to 'auto', the value of width received by the customLayout function is null, so you need to check if it is null. If it is null, set maxLineWidth to undefined to automatically expand the width of the cell. If it is not null, set maxLineWidth according to the value of width. Subtracting 20 here avoids the width of the image, and the additional +1 is a buffer value that can be ignored.
Code Examples
import {createGroup, createText, createImage} from '@visactor/vtable/es/vrender';

  const option = {
    columns:[
      {
        field: 'bloggerId',
        title:'order number'
      },
      {
        field: 'bloggerName',
        title:'anchor nickname',
        width:'auto',
        style:{
          fontFamily:'Arial',
          fontWeight:500
        },
      customLayout: (args) => {
        const { table,row,col,rect } = args;
        const record = table.getRecordByCell(col,row);
        const  {height, width } = rect ?? table.getCellRect(col,row);
        const container = createGroup({
          height,
          width,
          display: 'flex',
          flexWrap:'no-wrap',
          alignItems: 'center',
          justifyContent: 'flex-front'
       });
        const bloggerAvatar = createImage({
          id: 'icon0',
          width: 20,
          height: 20,
          image:record.bloggerAvatar,
          cornerRadius: 10,
        });
        container.add(bloggerAvatar);
        const bloggerName = createText({
          text:record.bloggerName,
          fontSize: 13,
          x:20,
          fontFamily: 'sans-serif',
          fill: 'black',
          maxLineWidth:width===null?undefined:width-20+1
        });
        container.add(bloggerName);
        return {
          rootContainer: container,
          renderDefault: false,
        };
      }
    },
    {
      field: 'fansCount',
      title:'fansCount',
      fieldFormat(rec){
        return rec.fansCount + 'w'
      },
      style:{
        fontFamily:'Arial',
        fontSize:12,
        fontWeight:'bold'
      }
    },
    ],
   records:[
   {
      'bloggerId': 1,
      "bloggerName": "Virtual Anchor Xiaohua duoduo",
      "bloggerAvatar": "https://lf9-dp-fe-cms-tos.byteorg.com/obj/bit-cloud/VTable/custom-render/flower.jpg",
      "introduction": "Hi everyone, I am Xiaohua, the virtual host. I am a little fairy who likes games, animation and food. I hope to share happy moments with you through live broadcast.",
      "fansCount": 400,
      "worksCount": 10,
      "viewCount": 5,
      "city": "Dream City",
      "tags": ["game", "anime", "food"]
    },
    {
      'bloggerId': 2,
      "bloggerName": "Virtual anchor little wolf",
      "bloggerAvatar": "https://lf9-dp-fe-cms-tos.byteorg.com/obj/bit-cloud/VTable/custom-render/wolf.jpg",
      "introduction": "Hello everyone, I am the virtual anchor Little Wolf. I like music, travel and photography, and I hope to explore the beauty of the world with you through live broadcast.",
      "fansCount": 800,
      "worksCount": 20,
      "viewCount": 15,
      "city": "City of Music",
      "tags": ["music", "travel", "photography"]
      }
    ],
    defaultRowHeight:30
  };

const tableInstance = new VTable.ListTable(document.getElementById(CONTAINER_ID),option);
window['tableInstance'] = tableInstance;</br>
Result Display
Just paste the code in the example code directly into the official editor to present it.

Related documents
Tutorial on customLayout usage: https://visactor.io/vtable/guide/custom_define/custom_layout
Demo of customLayout usage: https://visactor.io/vtable/demo/custom-render/custom-cell-layout
Related API: https://visactor.io/vtable/option/ListTable-columns-text#customLayout
github:https://github.com/VisActor/VTable
